

Base path
All import endpoints are under the Data API:Authentication
Import requests use the same header-based auth as other Zixflow AI Data APIs. The API key must have the Dashboard permission. See Authentication.x-workspace-id must be the workspace that owns the API key.
Auth failures look like:
Daily limit
Shared daily limit across people + events + devices: plan default is 10 imports per UTC day (max_import_requests_per_day). Cancelling a job that is still in-queue refunds one slot.
How import works
- Host a CSV that returns raw CSV bytes over HTTPS (not an HTML share/preview page).
POSTthe file URL and column mapping.- The API creates a job with status
in-queueand returnsimport_id. GETstatus untilcompleted,failed, orcancelled.- If rows failed,
error_file_urlis a signed CSV of error rows (refreshed on poll; ~7 day expiry).
in-queue. Once processing has started, cancel returns 409.
Job statuses
Get mapping from the dashboard (recommended)
Hand-writingmapping is error-prone — system and custom attribute keys must match exactly. The simplest approach is to build the mapping once in the web app, then paste that JSON into your API request.
- Open ai.zixflow.com and start a manual import for Users, Events, or Devices.
- Complete the three steps below until Review shows the mapping JSON.
- Copy (or export) that JSON and send it as the
mappingfield of your import API request. - You can cancel the dashboard import after copying — you only need the mapping for the API.
Stage 1 — Upload file
Choose what to import (Users / Events / Devices), then upload or drop your CSV.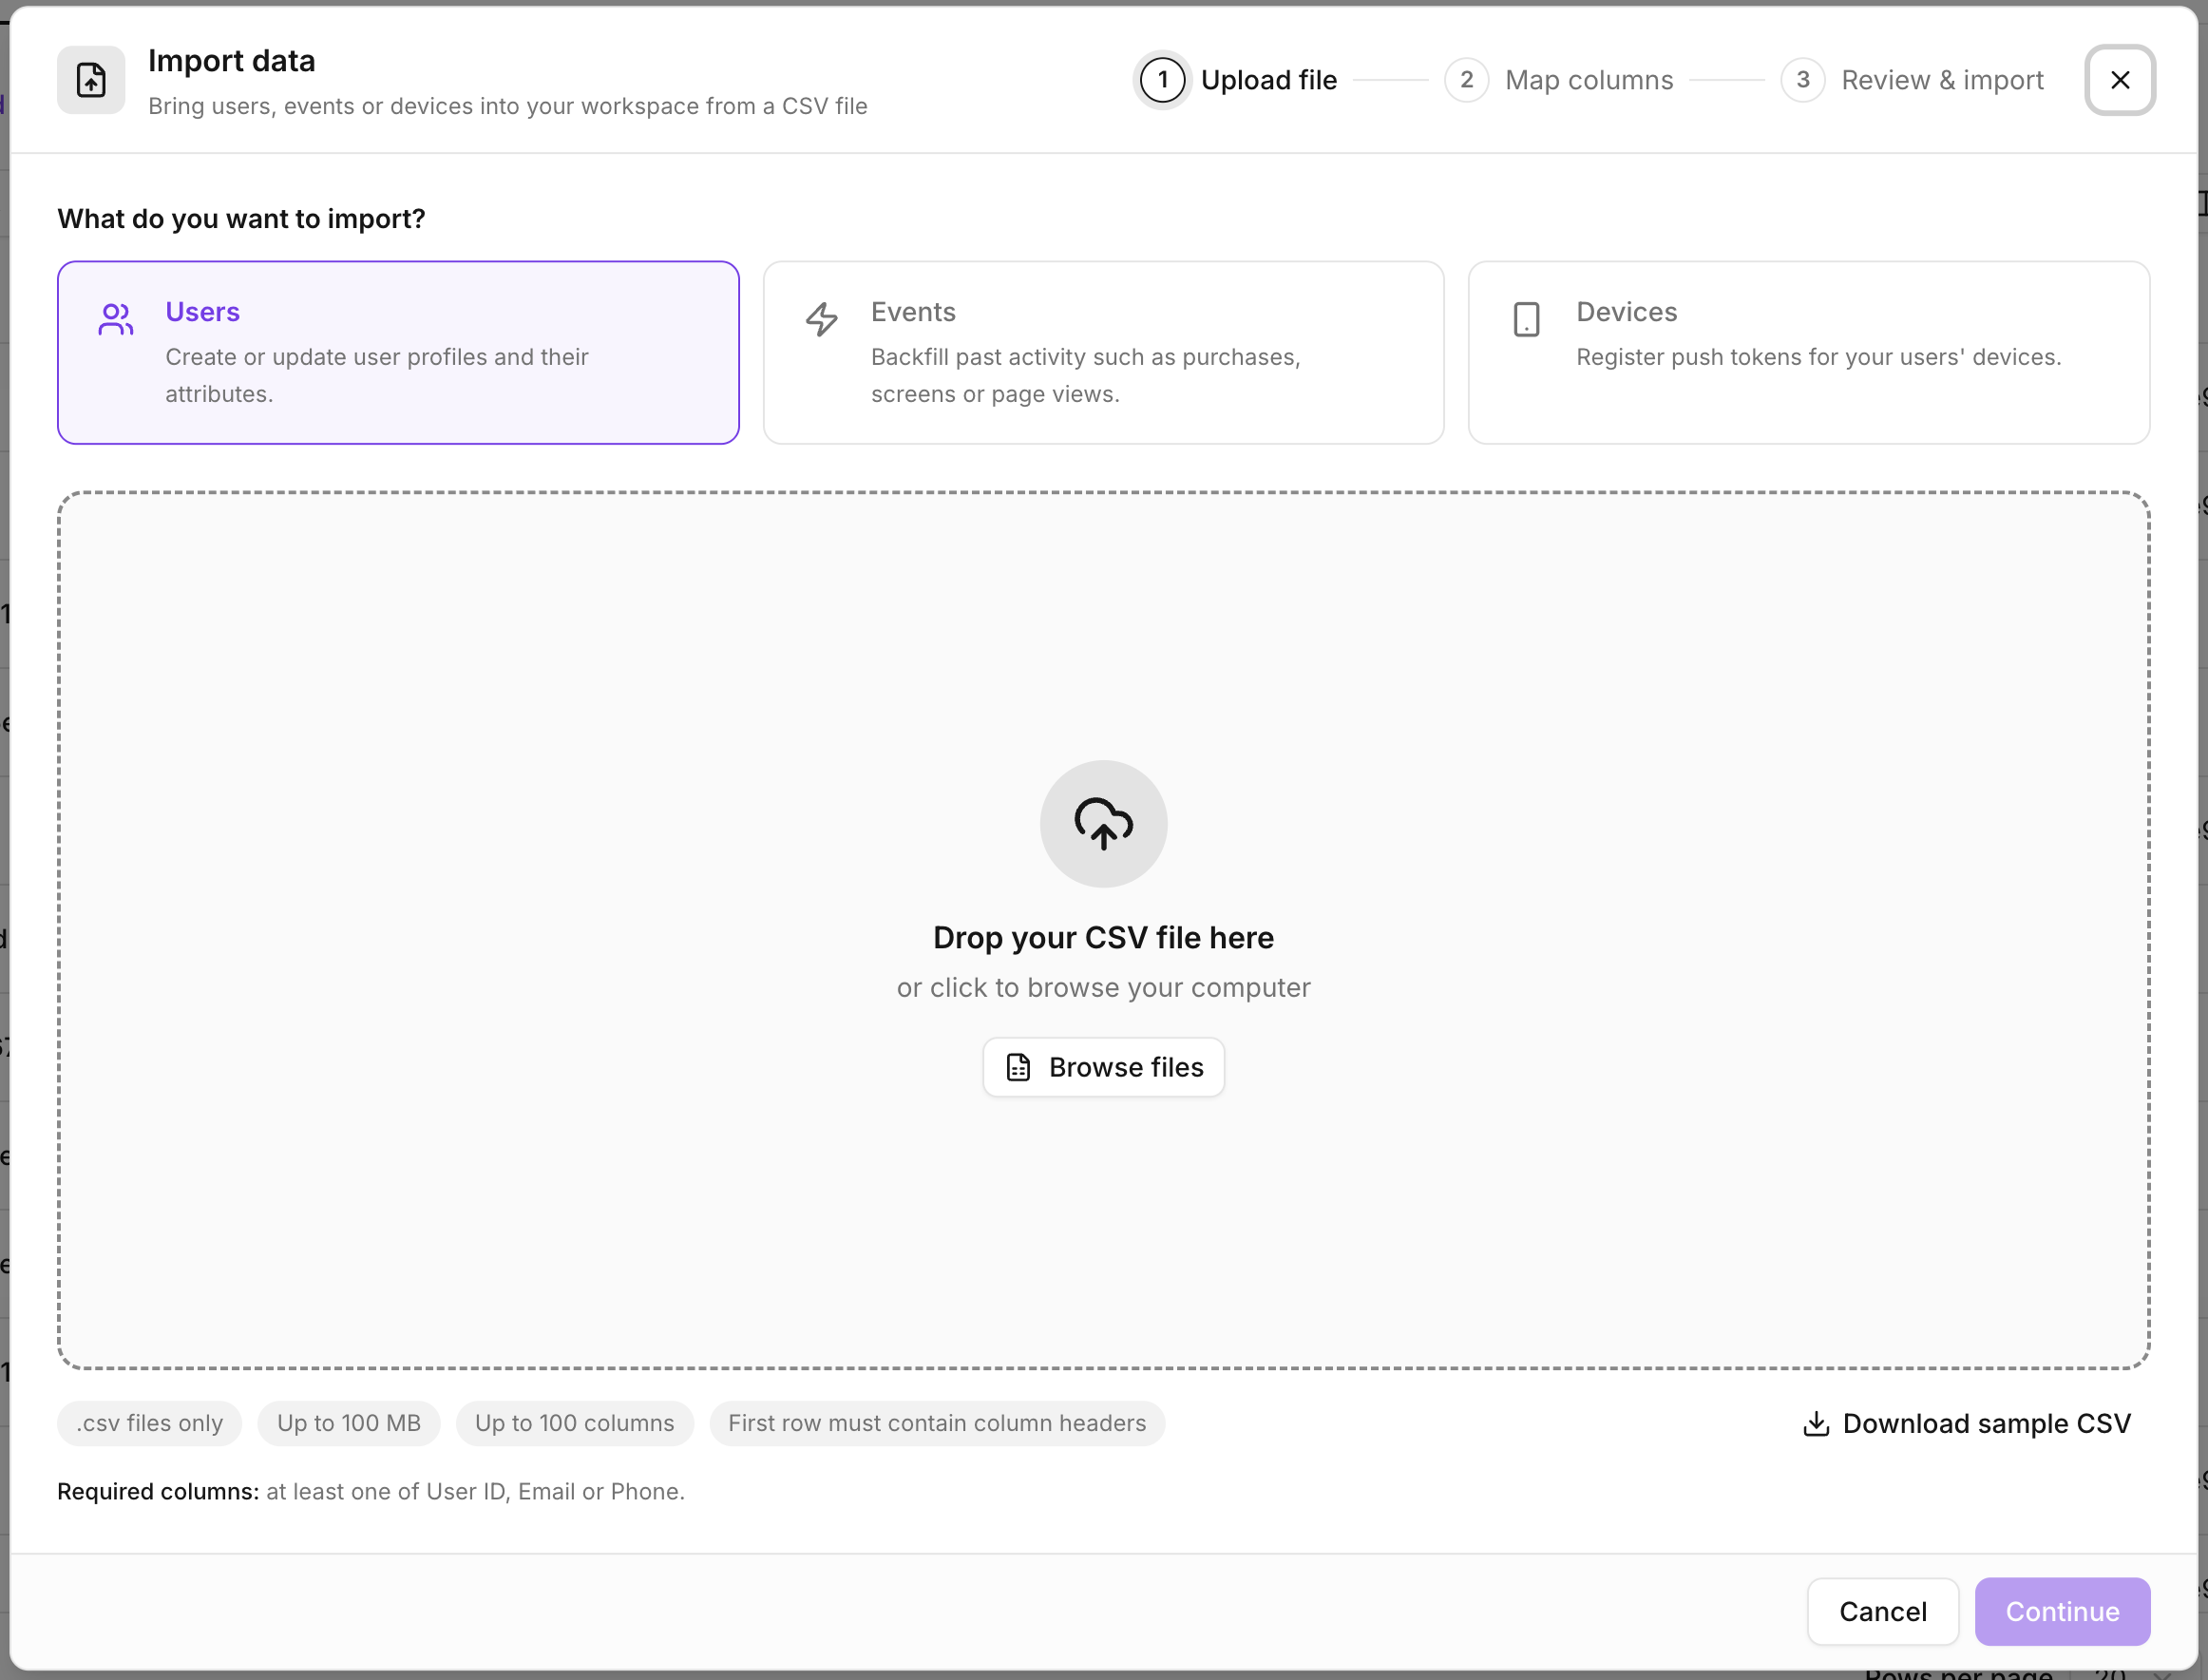
Stage 2 — Map columns
Map each CSV column to a system or custom attribute. Auto-match helps, and you can import a saved mapping JSON if you already have one.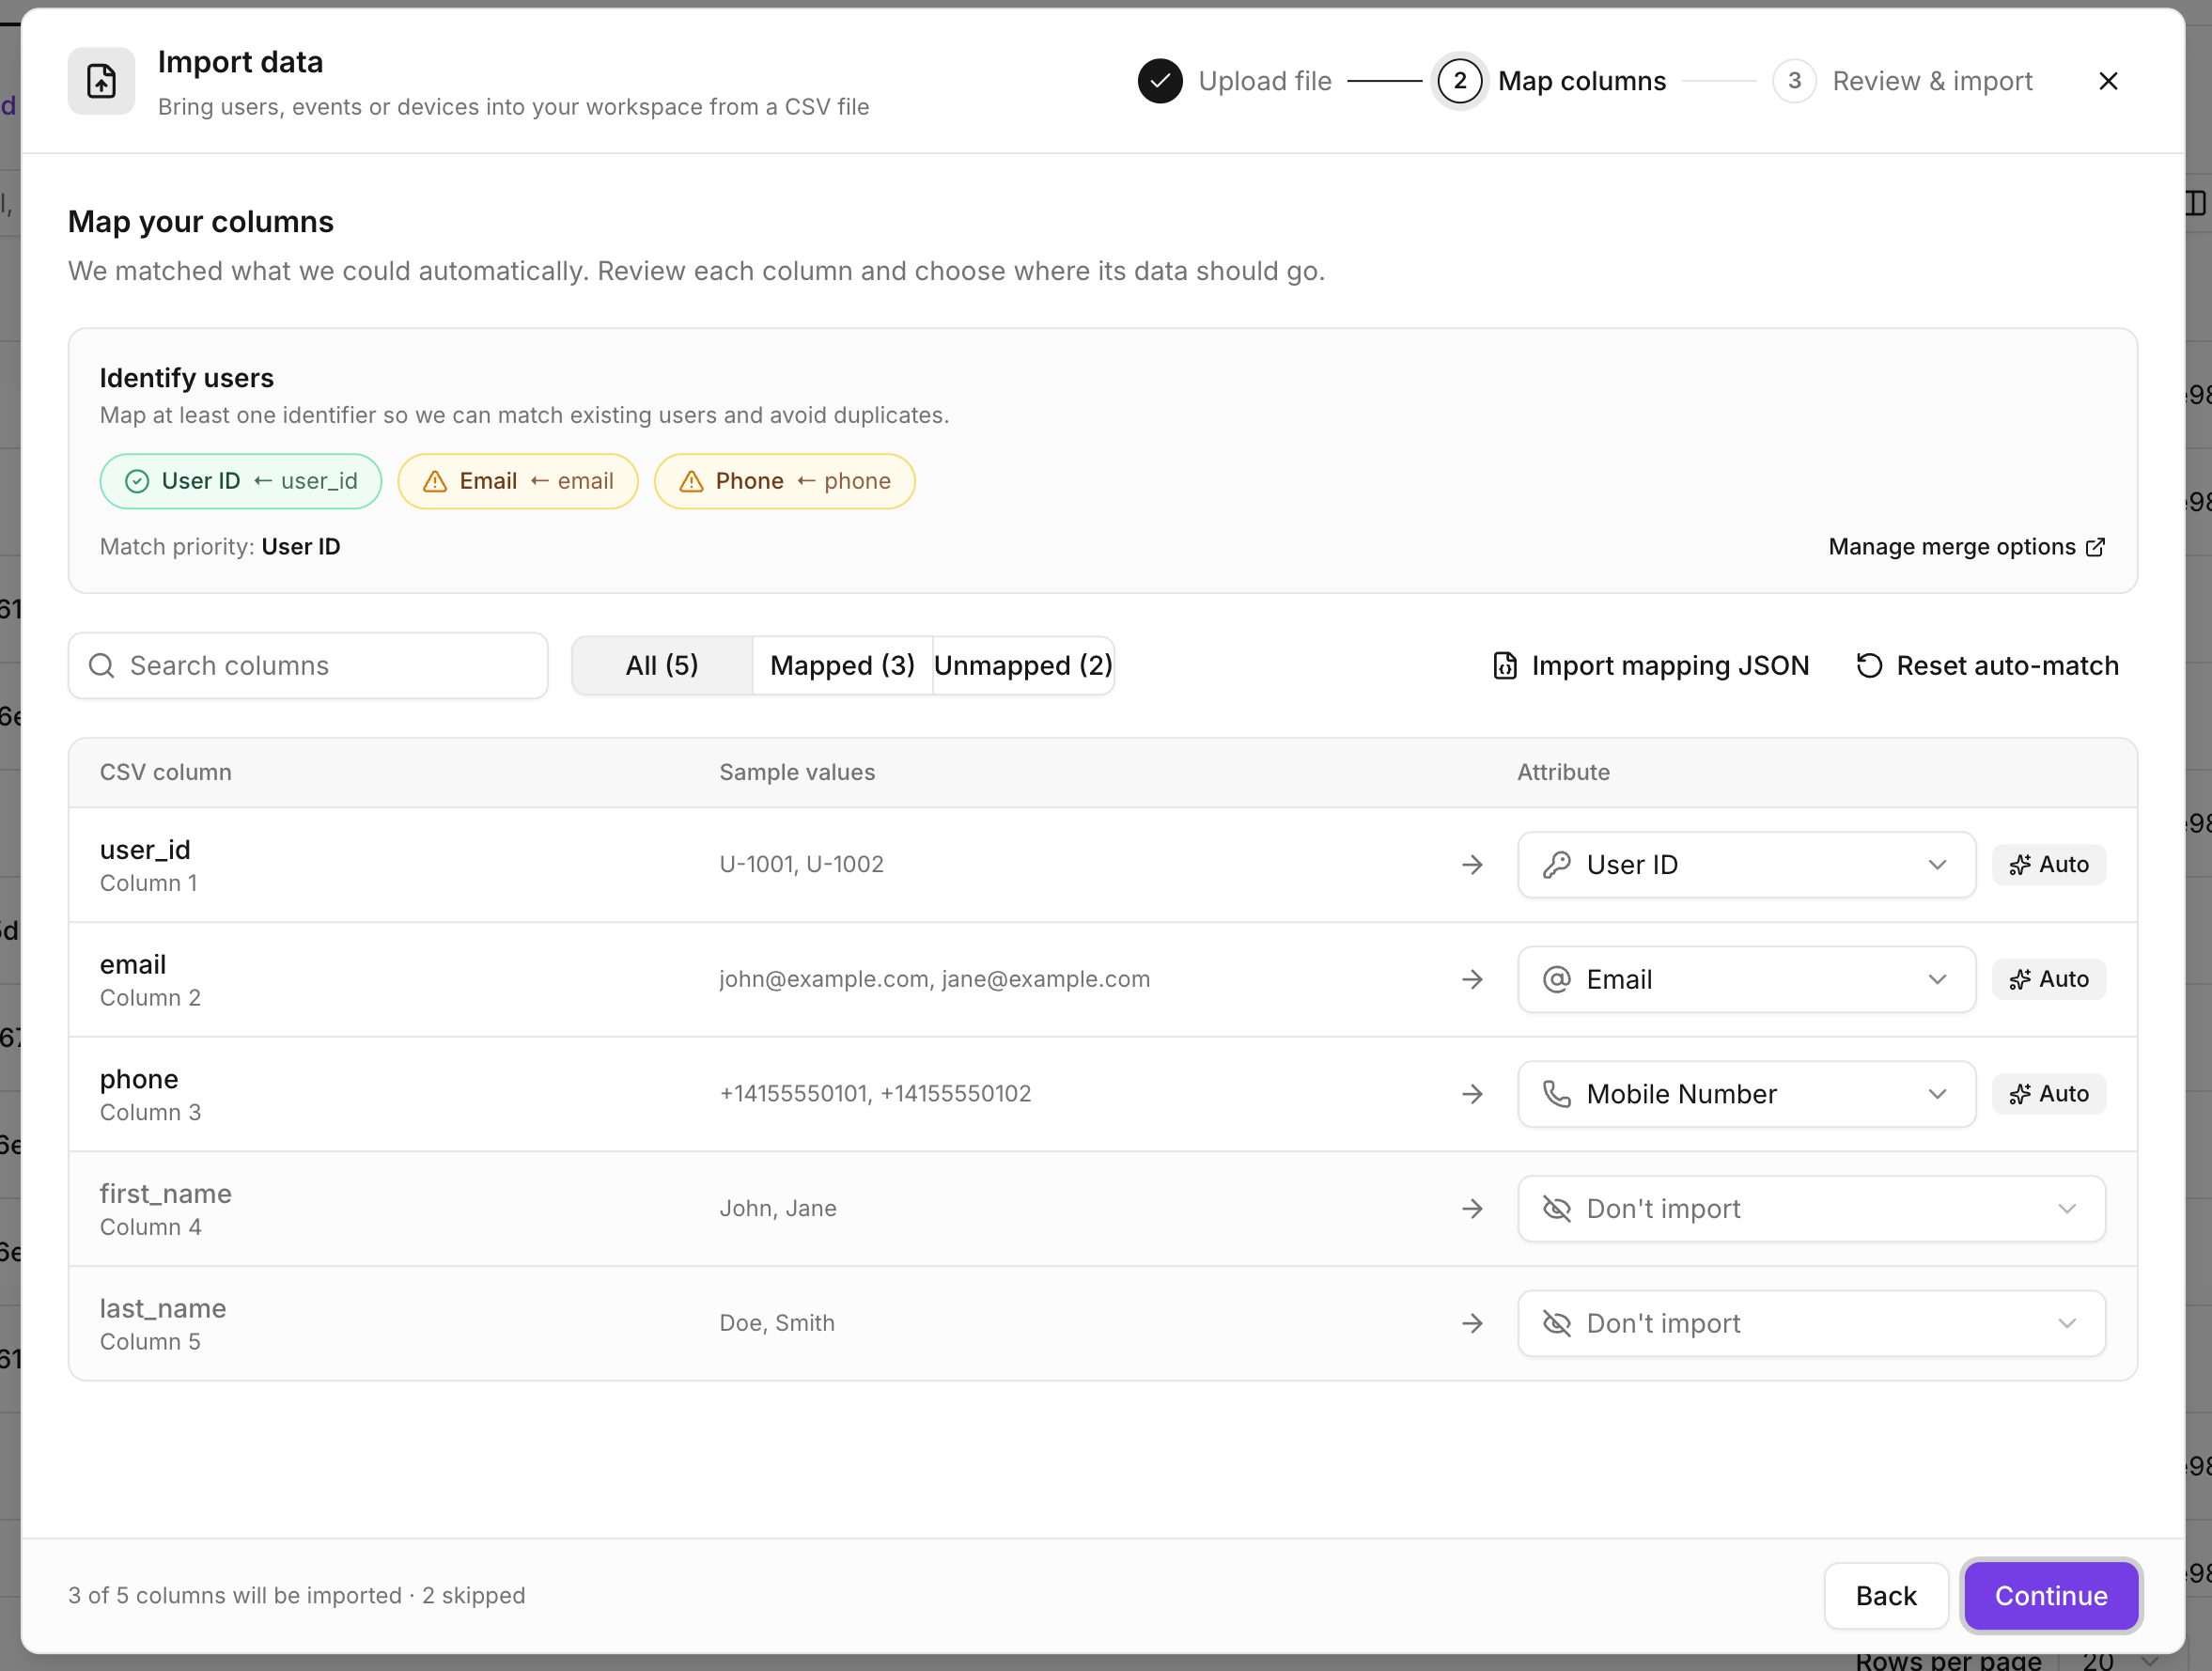
Stage 3 — Review and copy mapping
On Review & import, use the mapping JSON block labeled for API use. Copy it or click Export mapping JSON, then send that array asmapping in your API body.
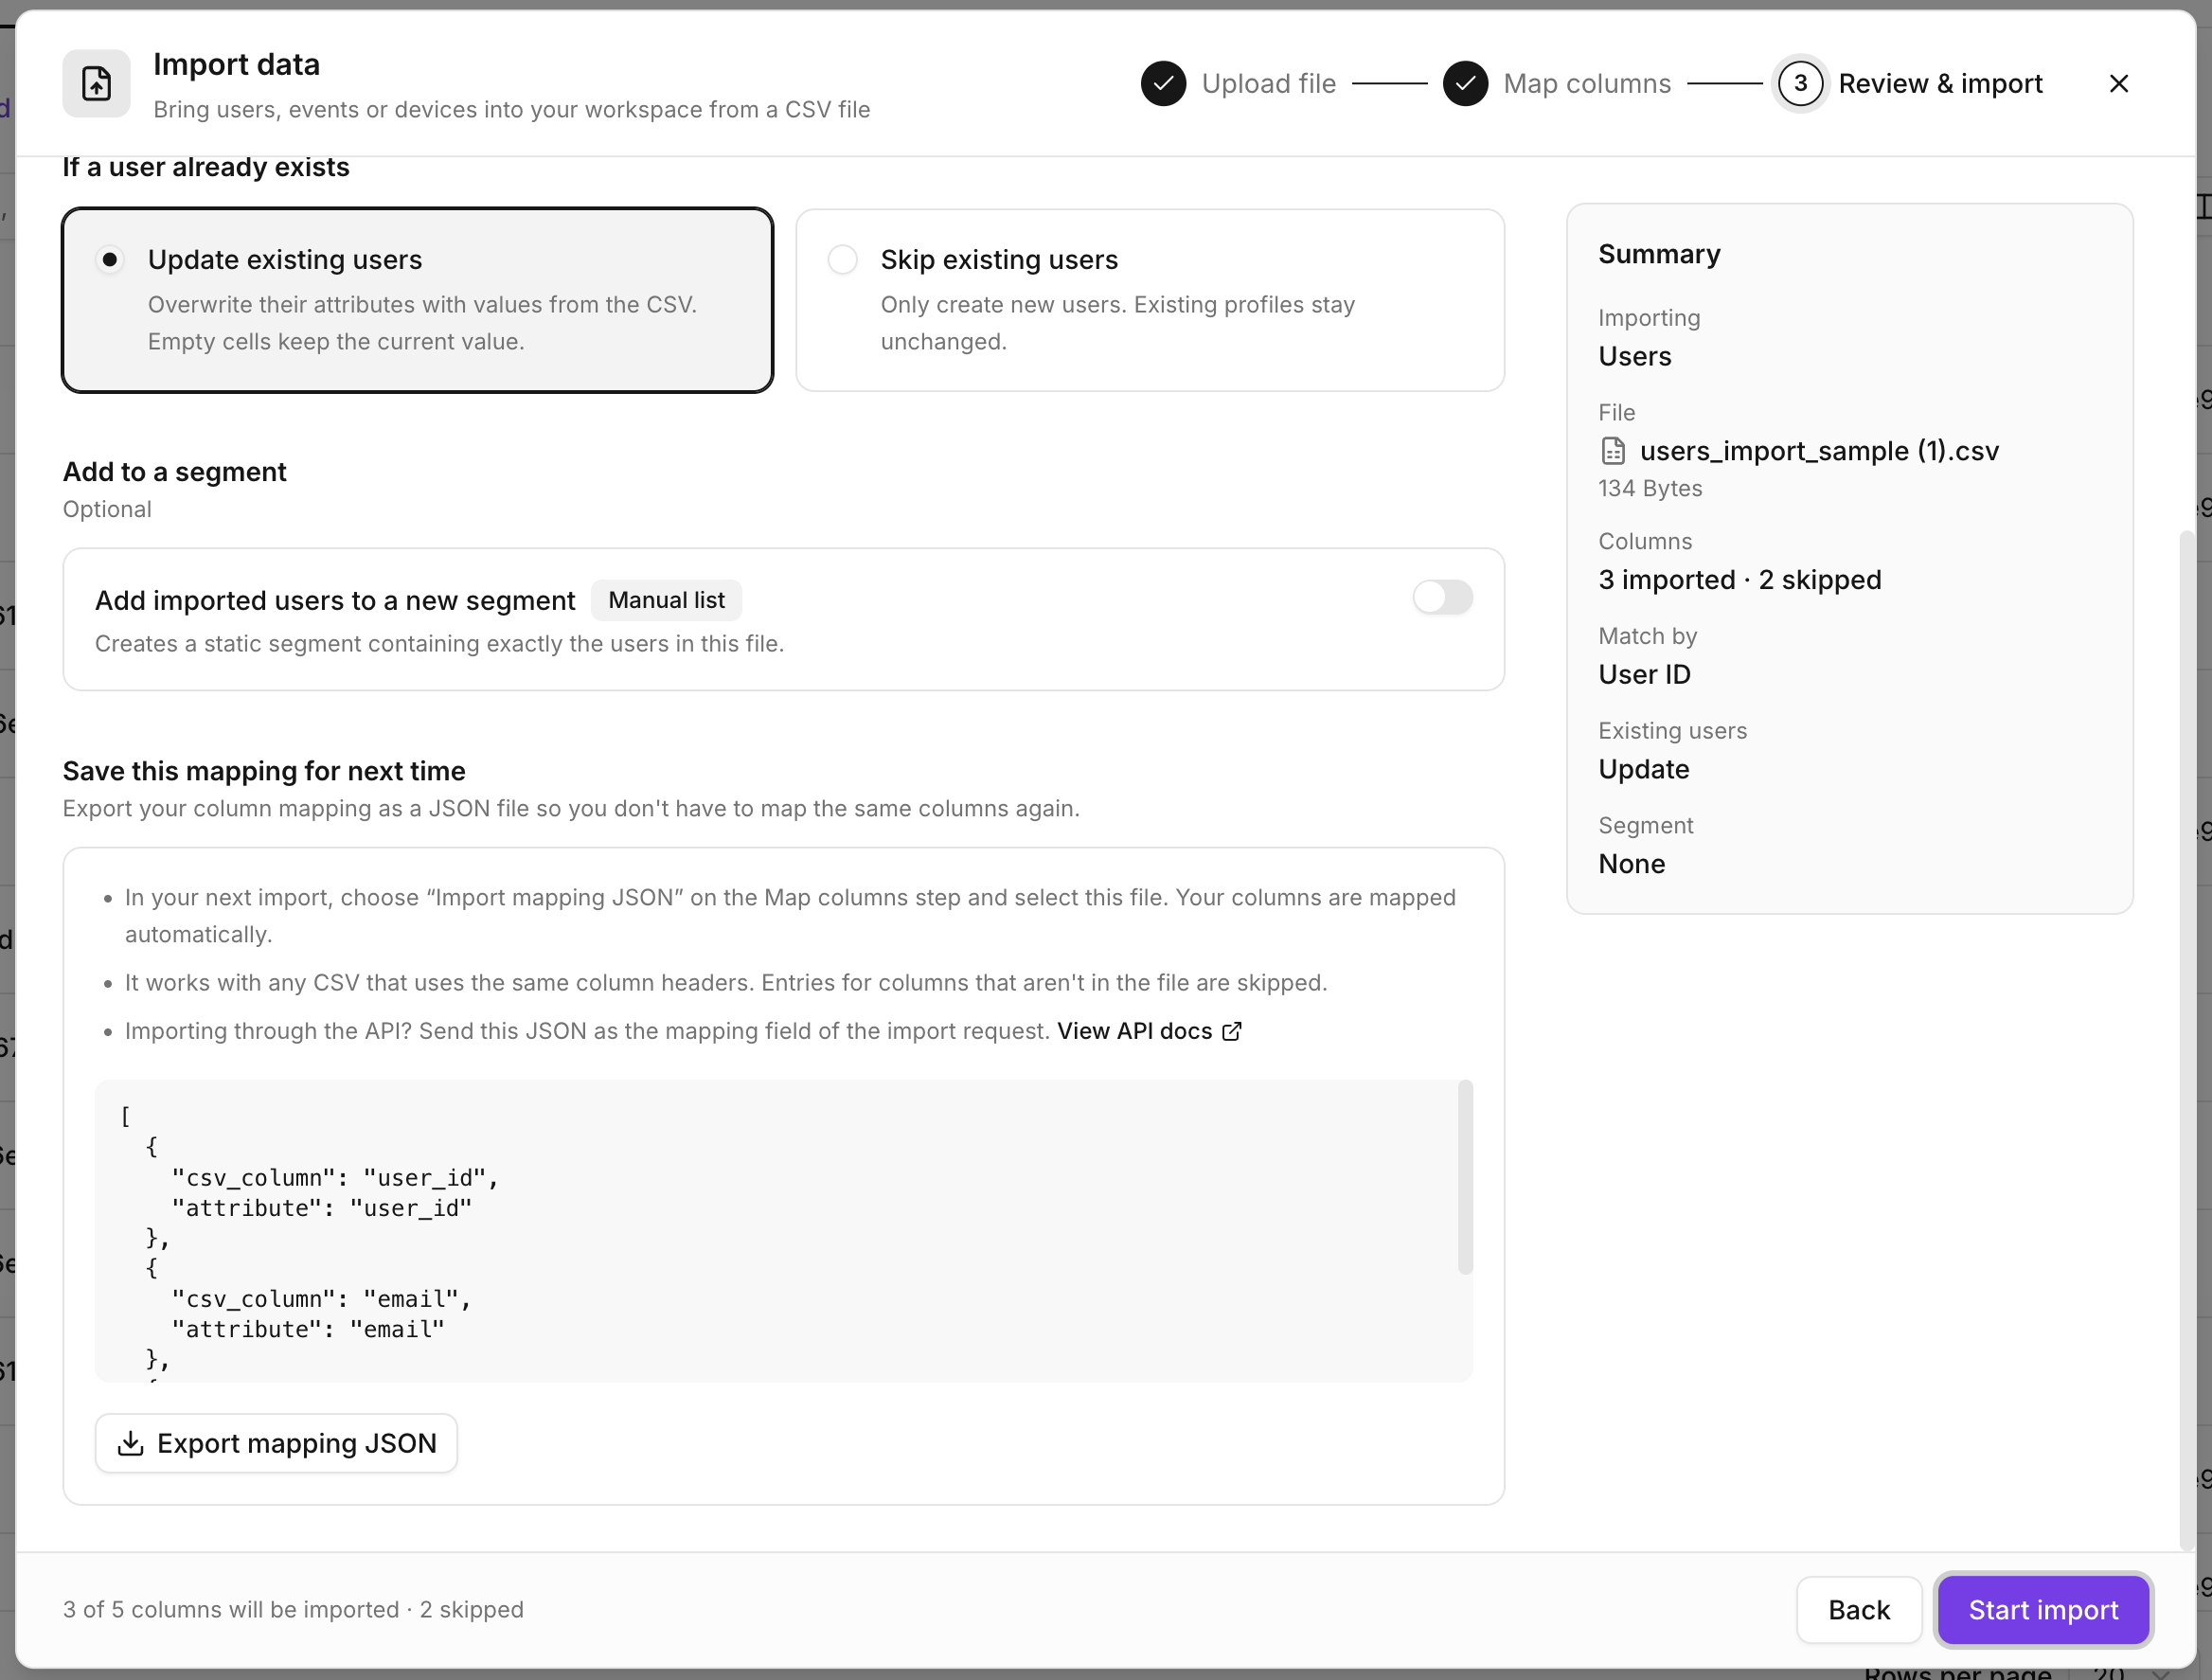 Example of a mapping copied from the dashboard:
Mapping rules (all modules)
- Always generate
mappingfrom the dashboard steps above. Attribute keys include system and custom fields for your workspace and are not listed here. mappingis required and must not be empty.- Each item needs
csv_columnandattribute(required attribute key). - CSV column names and attribute keys must be unique (case-insensitive).
csv_columnmust match the CSV header exactly.
file_url rules
- Required
- Must be a valid
https://URL with a host - Must return raw CSV bytes when fetched
Endpoints
Suggested poll loop
- Create import → store
data.import_id. - Poll
GET …/import/{import_id}every few seconds. - Stop on
completed,failed, orcancelled. - If
failed> 0 or you need row-level errors, downloaderror_file_url.
in-progress. That request will fail with 409 and will not refund a daily slot.